Event setup
Add an after party, recovery brunch or other gathering to the same RSVP page. Learn how to add event details, choose whether guests need to RSVP and view their replies.
How to add additional events to the one event
Use Additional Events when your celebration includes something alongside the main event, such as pre-wedding drinks, an after party or a recovery brunch. Guests will see the additional event beneath the main event details on the same RSVP page.
Add an event
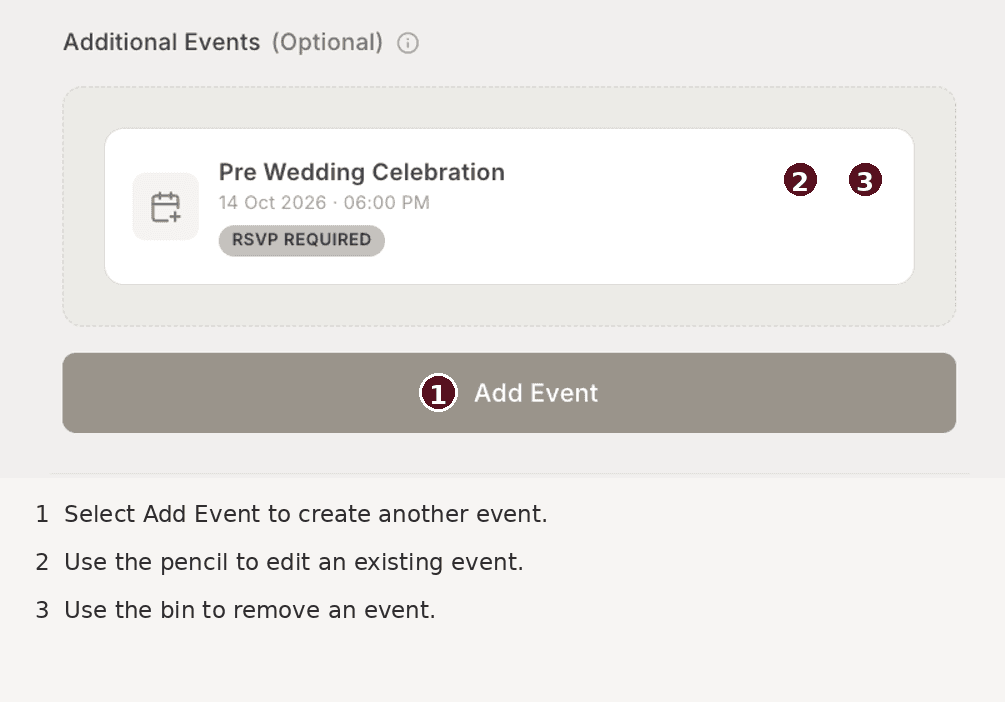
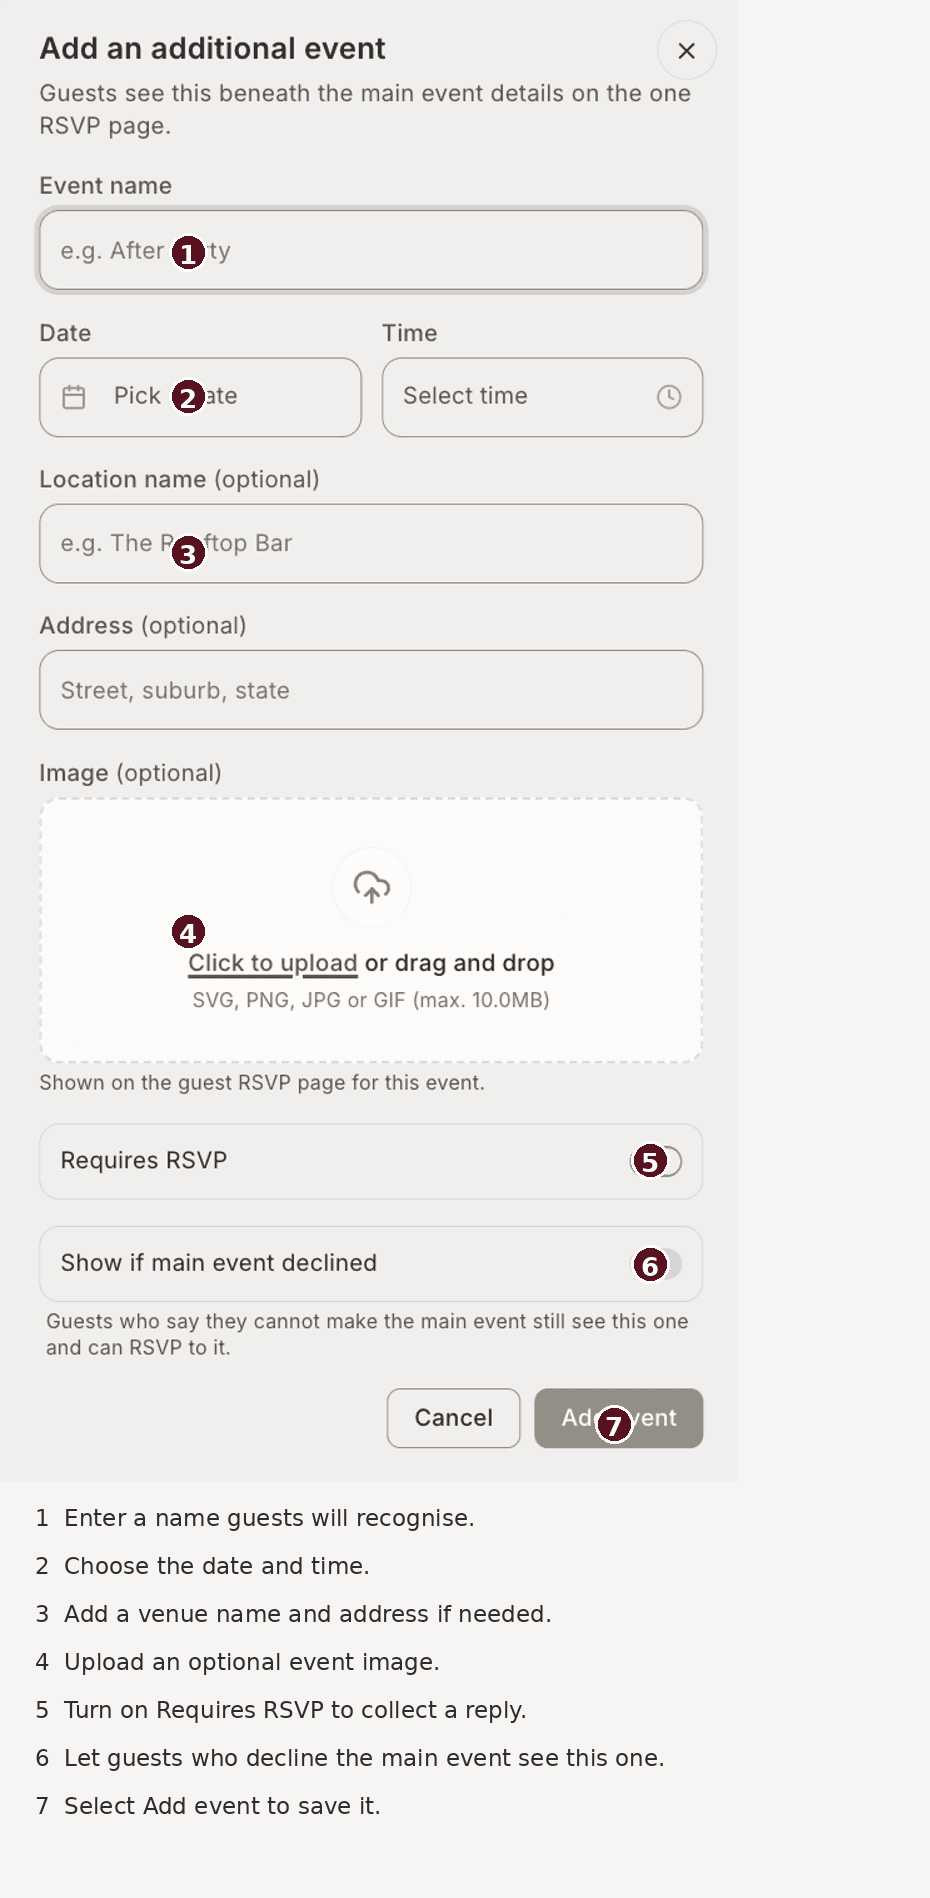
In Step 1 - Find Additional Events while setting up your event and select Add Event.
Enter an event name, then choose its date and time.
Add a location name and address if guests need them.
Upload an image if you’d like this event to have its own visual. The image appears on the guest RSVP page.
Review the RSVP settings below, then select Add event to save it.
Choose who can reply
Requires RSVP lets guests respond to the additional event separately. Turn it on when you need to know who is coming. Leave it off when you only want to share the event details.
Show if main event declined lets someone who declines the main event still see and RSVP to this additional event. This is useful if a guest cannot attend the main celebration but may be able to join the after party or another gathering.
What guests will see
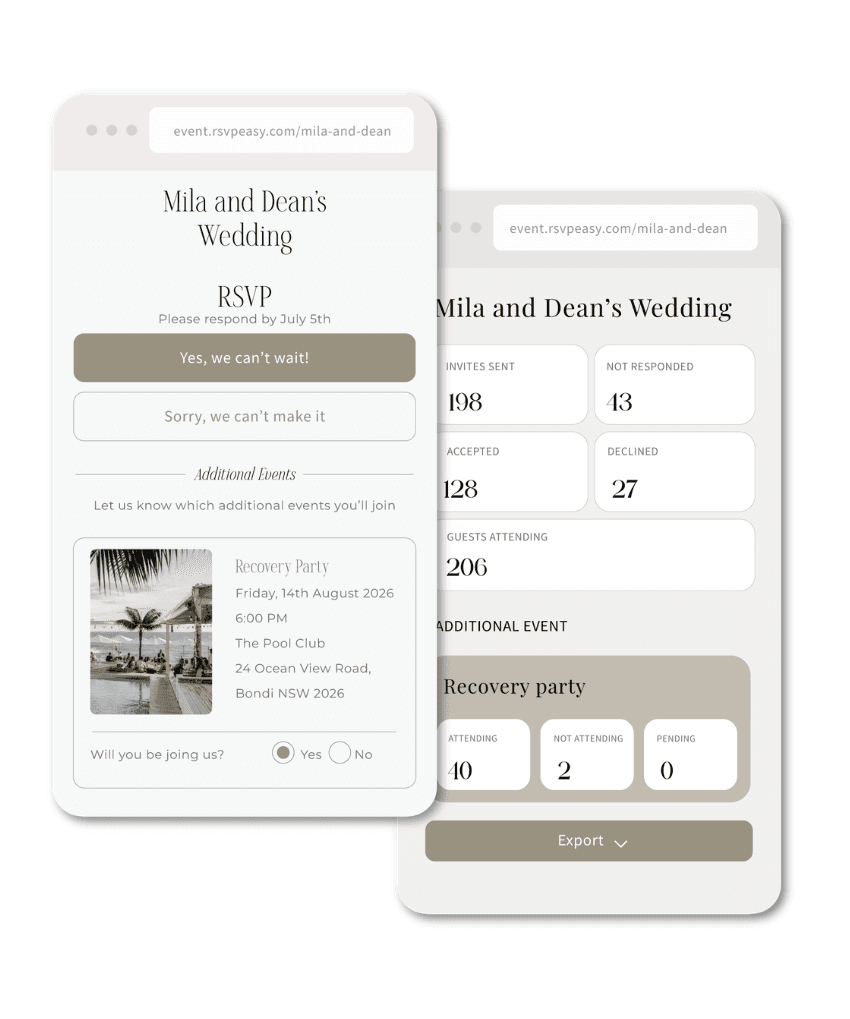
Guests see your additional events beneath the main RSVP on the same page. Each event can show its own image, name, date, time and location. If Requires RSVP is on, guests can choose Yes or No for that event separately from their reply to the main event.
In this example, a guest can reply to Mila and Dean’s wedding and then say whether they’ll attend the recovery party. The host can see the additional event’s attending, not attending and pending counts in their dashboard.
Add or change more events
Select Add Event again for each gathering you want to include. Your saved events appear in the Additional Events section. Use the pencil icon to change an event’s details or the bin icon to remove it.
Before sharing your RSVP link, preview the guest page to check that each event’s date, location, image and RSVP options appear as intended.